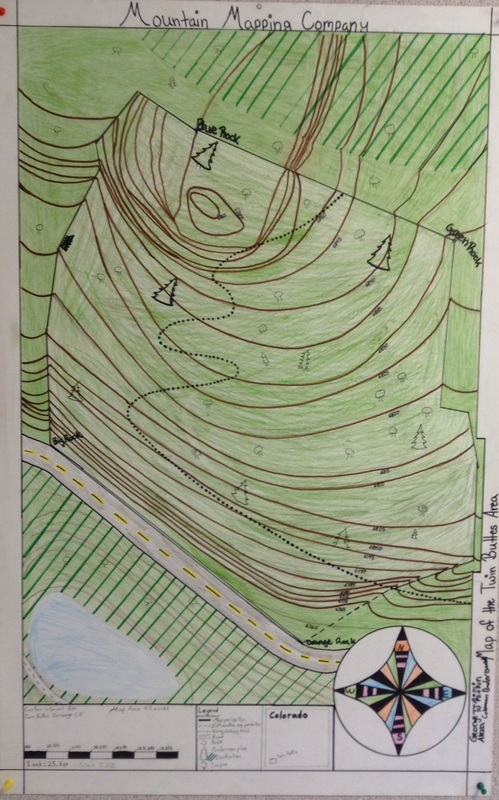
twin buttes topographic map project
Topographic Map
To Measure our bearings and paces in the field, we had one person who had a compass and used it to calculate the direction we were walking in from one landmark to the next around the perimeter of the mapping area. We had someone counting their strides between the points, we had the same person do that the whole time so that their were not different stride lengths. We also had someone marking waypoints on the GPS which tells you how high you are and exactly what your latitude longitude is, and they also wrote all of the information down. Once we had all of the information that we needed, we used it to create our map. We drew a compass so that we could point the protractor North every time. Then we placed the first point and used the protractor to find out which direction the coordanance of the next point were at, we used a scale so that one pace was a certain distance on the map and then once we had all of the points we just connected them to get the boundaries of the mapping area. we used Google Earth to plot our contour lines by flagging all of the landmarks on the map and then we put in the high and low points on the map and then from the low point added 5m and then traced what the perimeter looked like and then added another 5 and traced again until we had this topo map. contour lines are lines that join points of equal height above sea level, but their are also topo maps of the sea floor. These lines can be used to see what the terrain of a certain area looks like, a lot of times hikers use them to find routs up mountains. This project not only taught us how to use Google Earth to make a topographic map and how to use a GPS, but also taught us how to use compasses to navigate from one point to another which we can use throughout our whole lives and by the end of the project we all had a good idea of what the terrain looked like in the area that we mapped.
To Measure our bearings and paces in the field, we had one person who had a compass and used it to calculate the direction we were walking in from one landmark to the next around the perimeter of the mapping area. We had someone counting their strides between the points, we had the same person do that the whole time so that their were not different stride lengths. We also had someone marking waypoints on the GPS which tells you how high you are and exactly what your latitude longitude is, and they also wrote all of the information down. Once we had all of the information that we needed, we used it to create our map. We drew a compass so that we could point the protractor North every time. Then we placed the first point and used the protractor to find out which direction the coordanance of the next point were at, we used a scale so that one pace was a certain distance on the map and then once we had all of the points we just connected them to get the boundaries of the mapping area. we used Google Earth to plot our contour lines by flagging all of the landmarks on the map and then we put in the high and low points on the map and then from the low point added 5m and then traced what the perimeter looked like and then added another 5 and traced again until we had this topo map. contour lines are lines that join points of equal height above sea level, but their are also topo maps of the sea floor. These lines can be used to see what the terrain of a certain area looks like, a lot of times hikers use them to find routs up mountains. This project not only taught us how to use Google Earth to make a topographic map and how to use a GPS, but also taught us how to use compasses to navigate from one point to another which we can use throughout our whole lives and by the end of the project we all had a good idea of what the terrain looked like in the area that we mapped.
Rocket project:
Rocket entries:
Day 1: today I drew our sketch of both rockets. One will have a single chamber and the other a double.
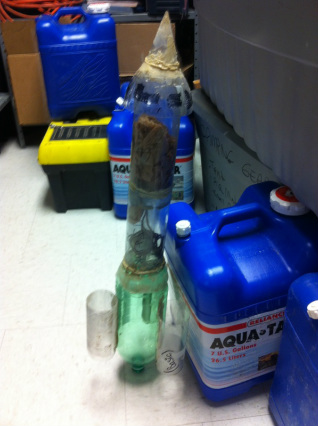
Day 2: today I bought 7 bottles and we started cutting the chamber for the big rocket and glued the top of a scrap bottle to the single chamber to make a smooth space to glue the long part on.
Day 3: today I bought more smart water bottles to make the length of our rockets as well we started on our tubular fins.
Day 4: today I began to work on the parachute for my small rocket, my nose come broke and I need to brainstorm a better and stronger design.
Day 5: today I began to attach the length of my rocket and glued to strings to my parachute and attached them to the rocket
Day 6: today I attached the fins to the rocket but they slid so I had to reattach them
Day 7: today I made a new nose cone with caulk and it is really strong it should work really well
Day 8: today I completed my rocket and test launched it, it worked very well although the parachute didn't work, at the last launch the Titan flipped and broke my rocket, but I am proud it worked well
Day 1: today I drew our sketch of both rockets. One will have a single chamber and the other a double.
Day 2: today I bought 7 bottles and we started cutting the chamber for the big rocket and glued the top of a scrap bottle to the single chamber to make a smooth space to glue the long part on.
Day 3: today I bought more smart water bottles to make the length of our rockets as well we started on our tubular fins.
Day 4: today I began to work on the parachute for my small rocket, my nose come broke and I need to brainstorm a better and stronger design.
Day 5: today I began to attach the length of my rocket and glued to strings to my parachute and attached them to the rocket
Day 6: today I attached the fins to the rocket but they slid so I had to reattach them
Day 7: today I made a new nose cone with caulk and it is really strong it should work really well
Day 8: today I completed my rocket and test launched it, it worked very well although the parachute didn't work, at the last launch the Titan flipped and broke my rocket, but I am proud it worked well

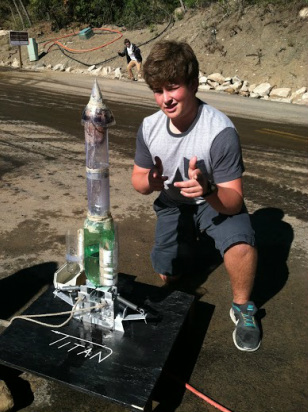
Rocket Reflection:
Although I couldn’t be at exhibition because I was in mexico I feel that our group did exceptionally. When we were working Luke and I listened well and we decided to make two separate rockets. One with a single bottle chamber and the other with two. As we built we had an extremely time until the titan launchpad destroyed our single chamber rocket. I bought more bottles and started to build another. I was able to salvage a couple of parts from my first rocket like my nose cone, tube length and fins. All that was really damaged was the chamber but that is the only part that you really need so we had to build another.
At that point we kind of set the big rocket as luke’s job and rebuilding the single chamber to myself. As soon as I left for mexico I checked in with luke periodically to check how we were doing on the rest of building and after exhibition he let me know that our big rocket (the golden squid?) went the second highest but didn’t have a deploying parachute. I was mostly happy with the results but the parachute would have made it that much better. Our rocket in the end went 819 ft. To figure this out we used the tangent function of the angle it launched.
Conclusion
Our rocket had an angle of 78 degrees, the observation team was 53 m away. Our actual hang time was 7.45 seconds. For our calculation of our max height we took the tangent of the angle of our rocket’s launch and cross multiplied to find our max height which was 248m. Our average velocity was 66.6 m/s. The hang time of our rocket was 7.45s. The theoretical hang time was 7.11 s. Making our error in flight time 34% which is quite low. If our parachute deployed the hang time would have increased. Overall I would rate our rocket “The Golden Squid” a 4 out of five. I think our rocket flew exceptionally and if the parachute would have deployed it would have easily been a 5.
Our rocket had an angle of 78 degrees, the observation team was 53 m away. Our actual hang time was 7.45 seconds. For our calculation of our max height we took the tangent of the angle of our rocket’s launch and cross multiplied to find our max height which was 248m. Our average velocity was 66.6 m/s. The hang time of our rocket was 7.45s. The theoretical hang time was 7.11 s. Making our error in flight time 34% which is quite low. If our parachute deployed the hang time would have increased. Overall I would rate our rocket “The Golden Squid” a 4 out of five. I think our rocket flew exceptionally and if the parachute would have deployed it would have easily been a 5.
rube goldberg project
In our rube Goldberg project we were assigned 2 partners and mine were Ellie duke and Brenden Wedertz, we chose a task which was to hit a ping pong ball with a paddle. it was a very long and strenuous process but it was tons of fun and I wish we could do it all over again. if I were to do it again I would I would try and turn a light switch on.
